

Hey guys, this is Gary with Door Closers USA. In today’s video, I’m going to show you how toreplace a key cylinder mortise lock with a thumb turn on a commercial storefront door.
In this example, the door has a standard key cylinder on the exterior and a key cylinder on theinterior. We’re going to remove the interior key cylinder and replace it with athumb turn.
All commercial door lock parts shown in this video are available at DoorClosersUSA.com,including cylinders, thumb turns, trim rings, and mortise lock components.
A thumb turn replaces the interior key cylinder and allows the lock to be operated by handinstead of a key. This is commonly used on:
The thumb turn uses the same cam mechanism as a keyed cylinder—it simply removes the key function.
The first step is to remove the mortise lock faceplate.
This exposes the mortise lock body and the interior lock cylinder.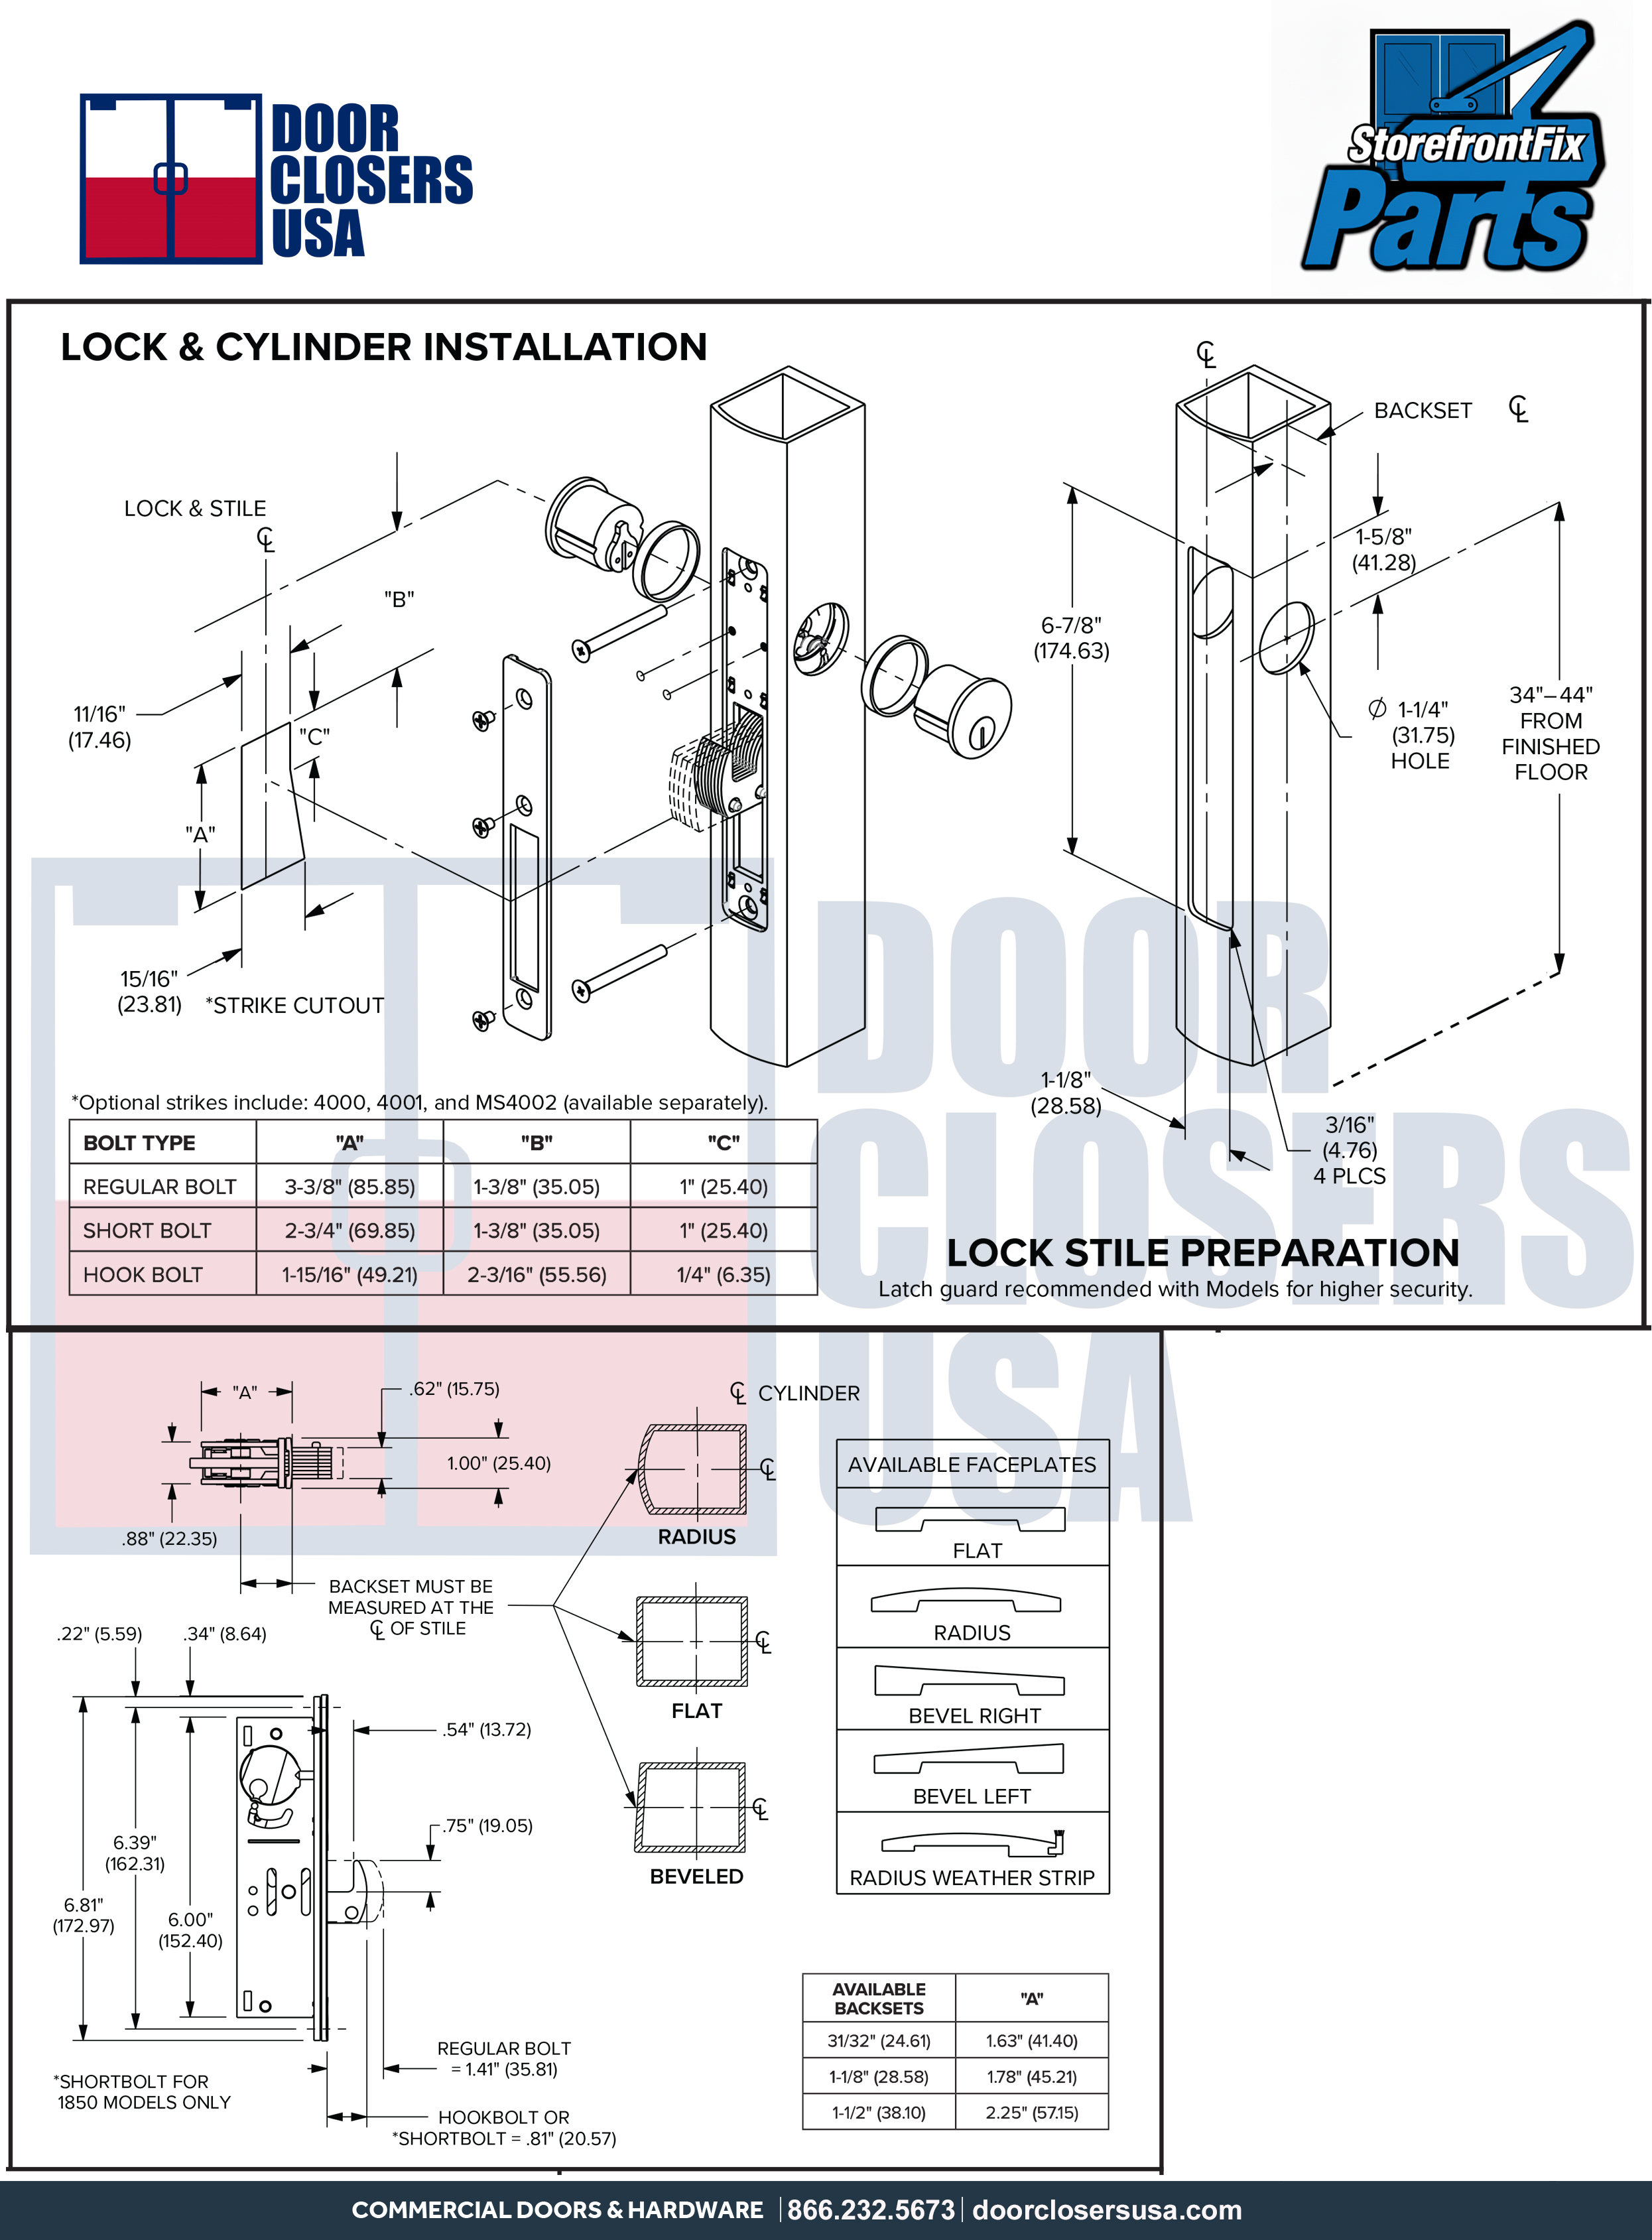
The interior key cylinder is threaded into the mortise lock body.A set screw prevents it from backing out.
If you look closely at the replacement thumb turn cylinder, you’ll notice small grooves.The set screw sits inside one of these grooves to lock the cylinder in place.
To remove the existing key cylinder:
If the cylinder feels tight, you may need to slightly loosen the mortise lock body screwsto relieve pressure from the door prep.
Once removed, you’ll see the cam attached to the back of the cylinder.This cam rotates and engages the hook bolt when the key is turned.
The thumb turn installs the same way as the keyed cylinder.
Once aligned, tighten the set screw into the groove.This locks the thumb turn securely in place and prevents rotation.
After the thumb turn is secured:
At this point, the thumb turn should be firmly installed and aligned.
Always test the lock before finishing the job.
Both sides should operate cleanly with no binding.
Replacing a key cylinder with a thumb turn is a simple upgrade that can improve convenienceand functionality on commercial doors.
We carry thumb turns, mortise lock cylinders, trim rings, and replacement lock parts forall commercial door makes and models.
If you’re unsure which part you need, send us photos of your lock and door,and we’ll help you identify the correct replacement.
Thanks for watching, and please like and subscribe to the Door Closers USA YouTube channelfor more commercial door repair guides.
Prefer to follow along visually? Watch the full video below to see how to replace a mortiselock key cylinder with a thumb turn step-by-step.

Whether you need a quotation or just have a question about a product. Reach out to us today by calling 866-232-5673 or text us questions and photos at 210-275-8966, and one of friendly specialists will be happy to help!