

Hey guys, this is Gary with Door Closers USA. Today we’re going to go overhow to replace a commercial storefront door deadbolt lock.This demo is on an interior storefront door in my office, but the same process applies toexterior storefront doors as well.
This is a typical narrow stile storefront glass door with a standard deadbolt setup:a thumb turn on the interior and a keyed cylinder on the exterior.
On most storefront deadbolt locks:
If your lock feels sticky, binds when turning, or won’t throw the bolt smoothly, it may be time toreplace the lock body, the cylinders, or both.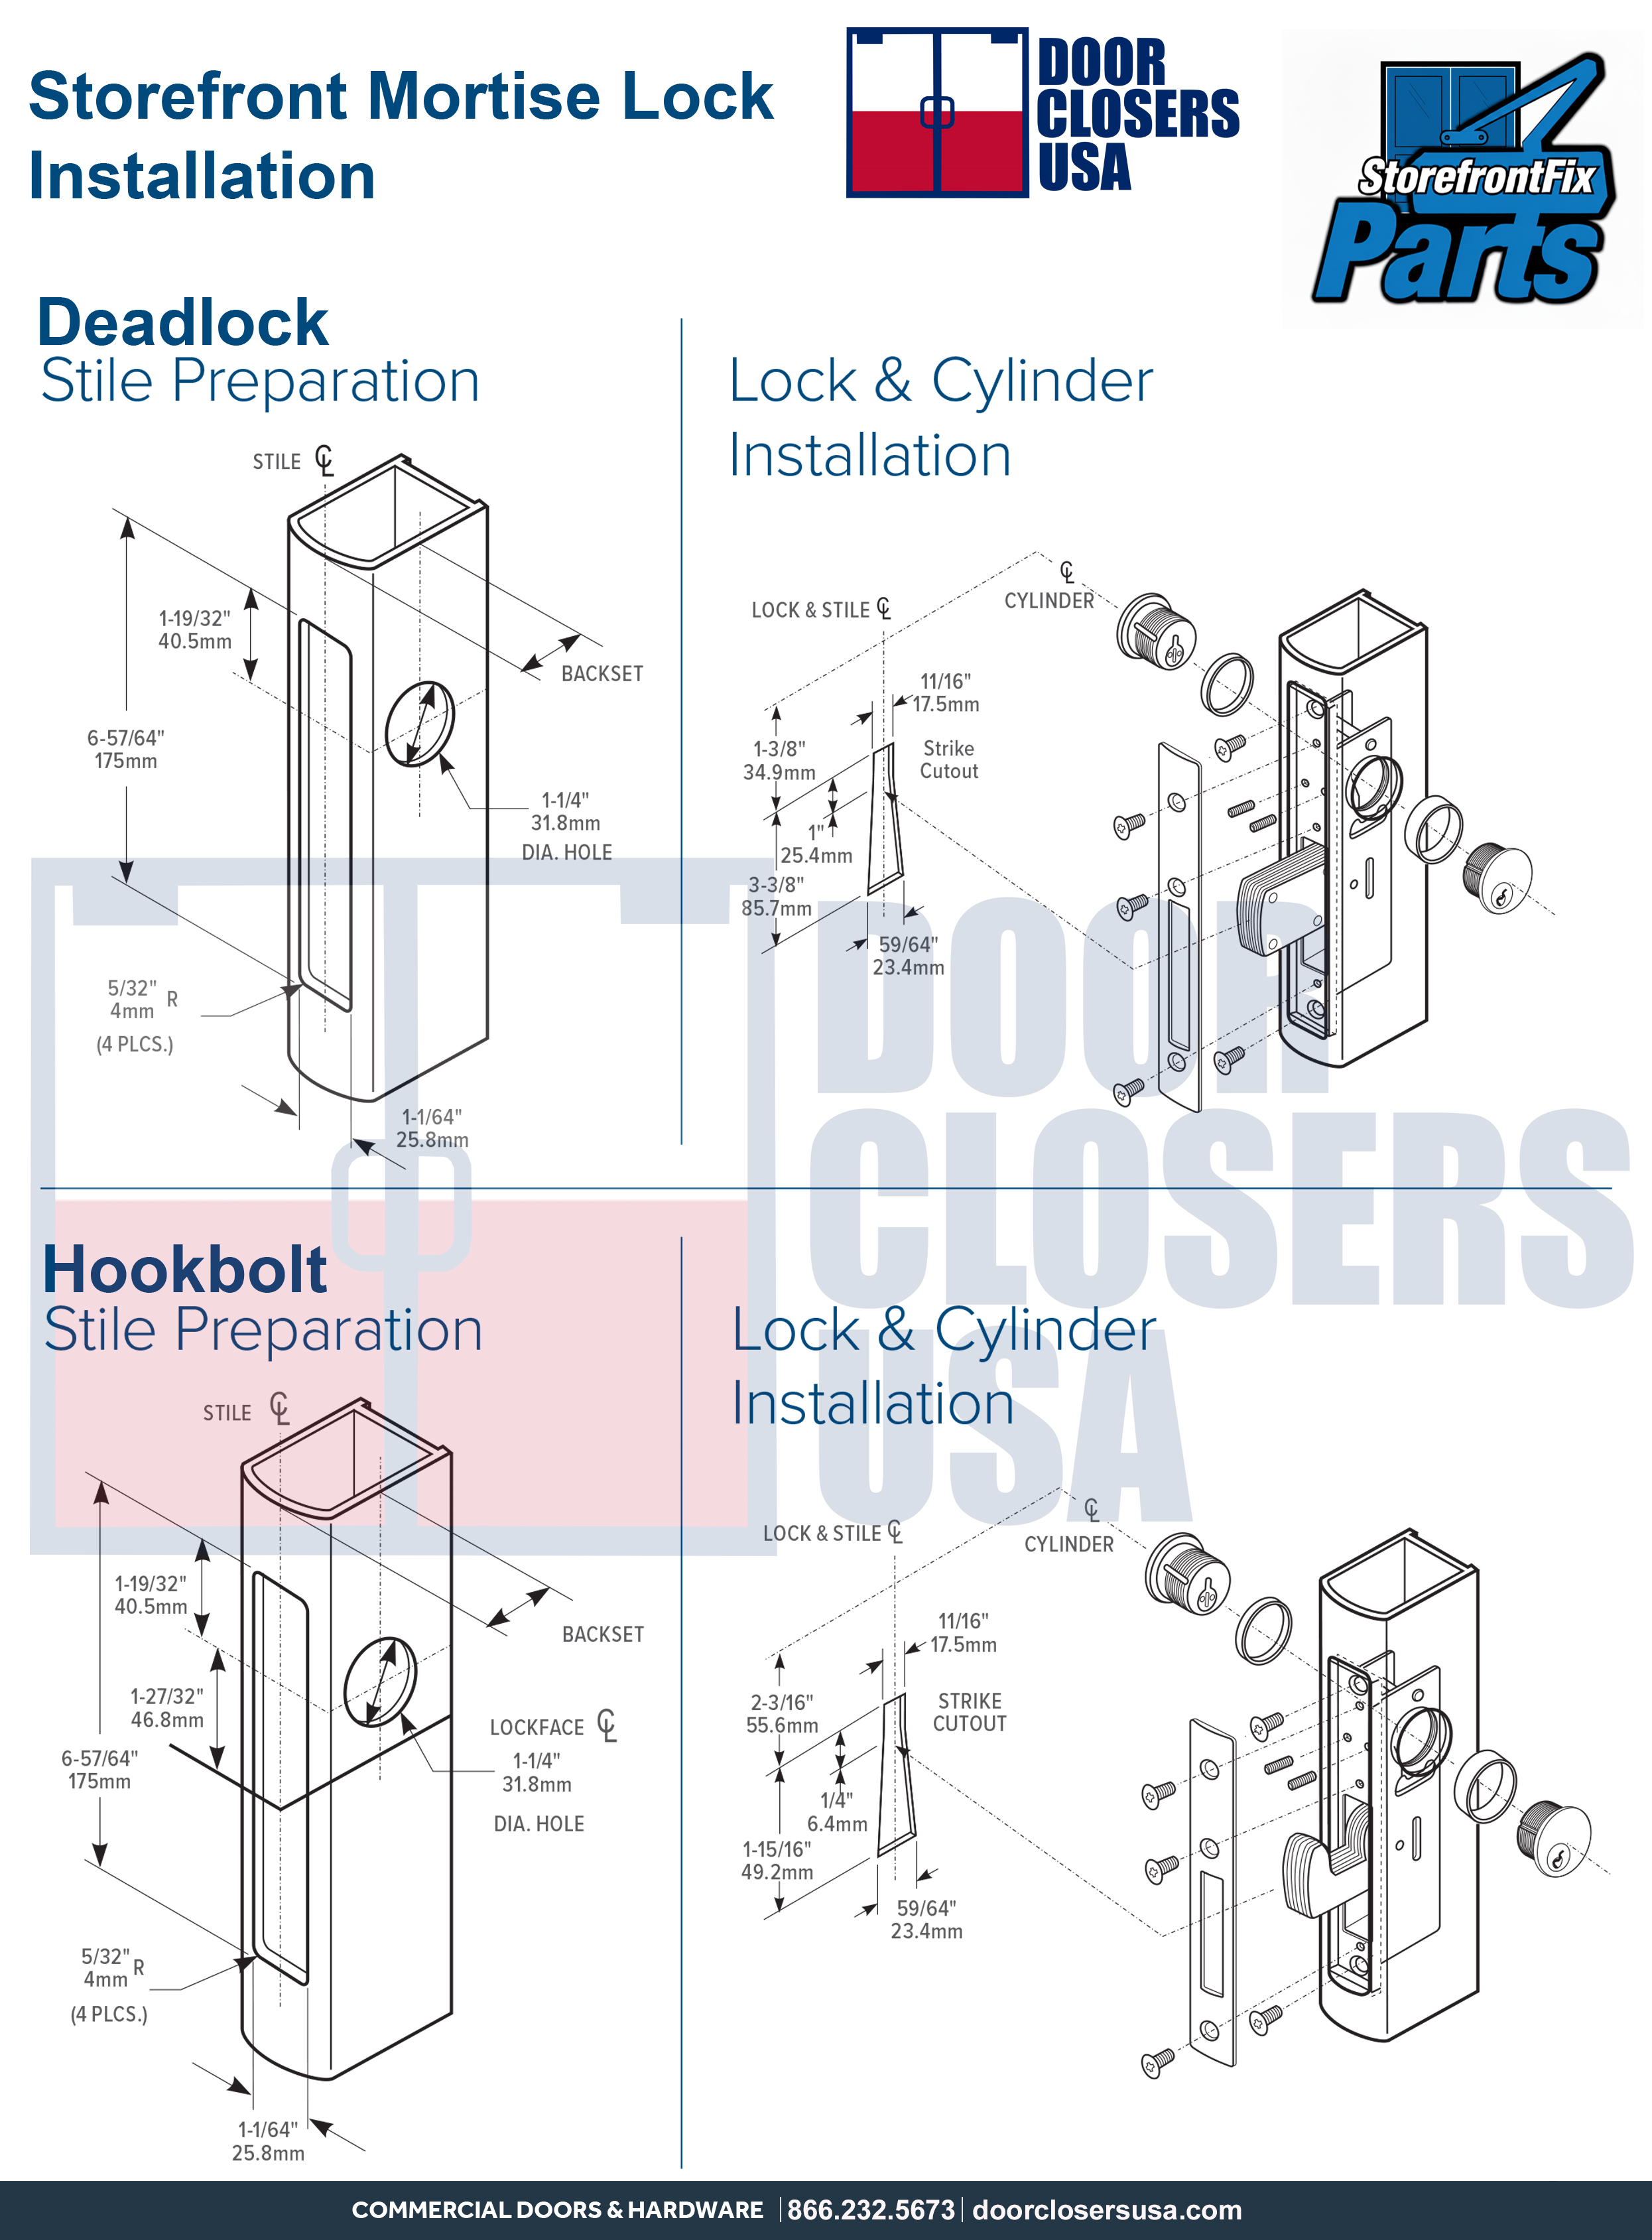
Start by removing the faceplate on the door edge.
On some door models, you may also have washers or lock washers behind the faceplate.Set them aside so you can reinstall them later.
Next, locate the two small set screws in the lock body. These set screws do not need to be fully removed.They only need to be loosened so they stop pressing into the cylinder grooves.
The set screw engages a groove in the cylinder to prevent someone from simply unthreading it.Once loosened, the cylinders can be unthreaded.
After loosening the set screws:
Depending on the model, the cylinders may include trim rings (for example, a 316C trim ring).Save these if you’re reusing them, or replace them if needed.
Inside the cylinder assembly is a cam. When you turn the thumb turn or key, the cam rotates and engages thelock mechanism to throw the deadbolt.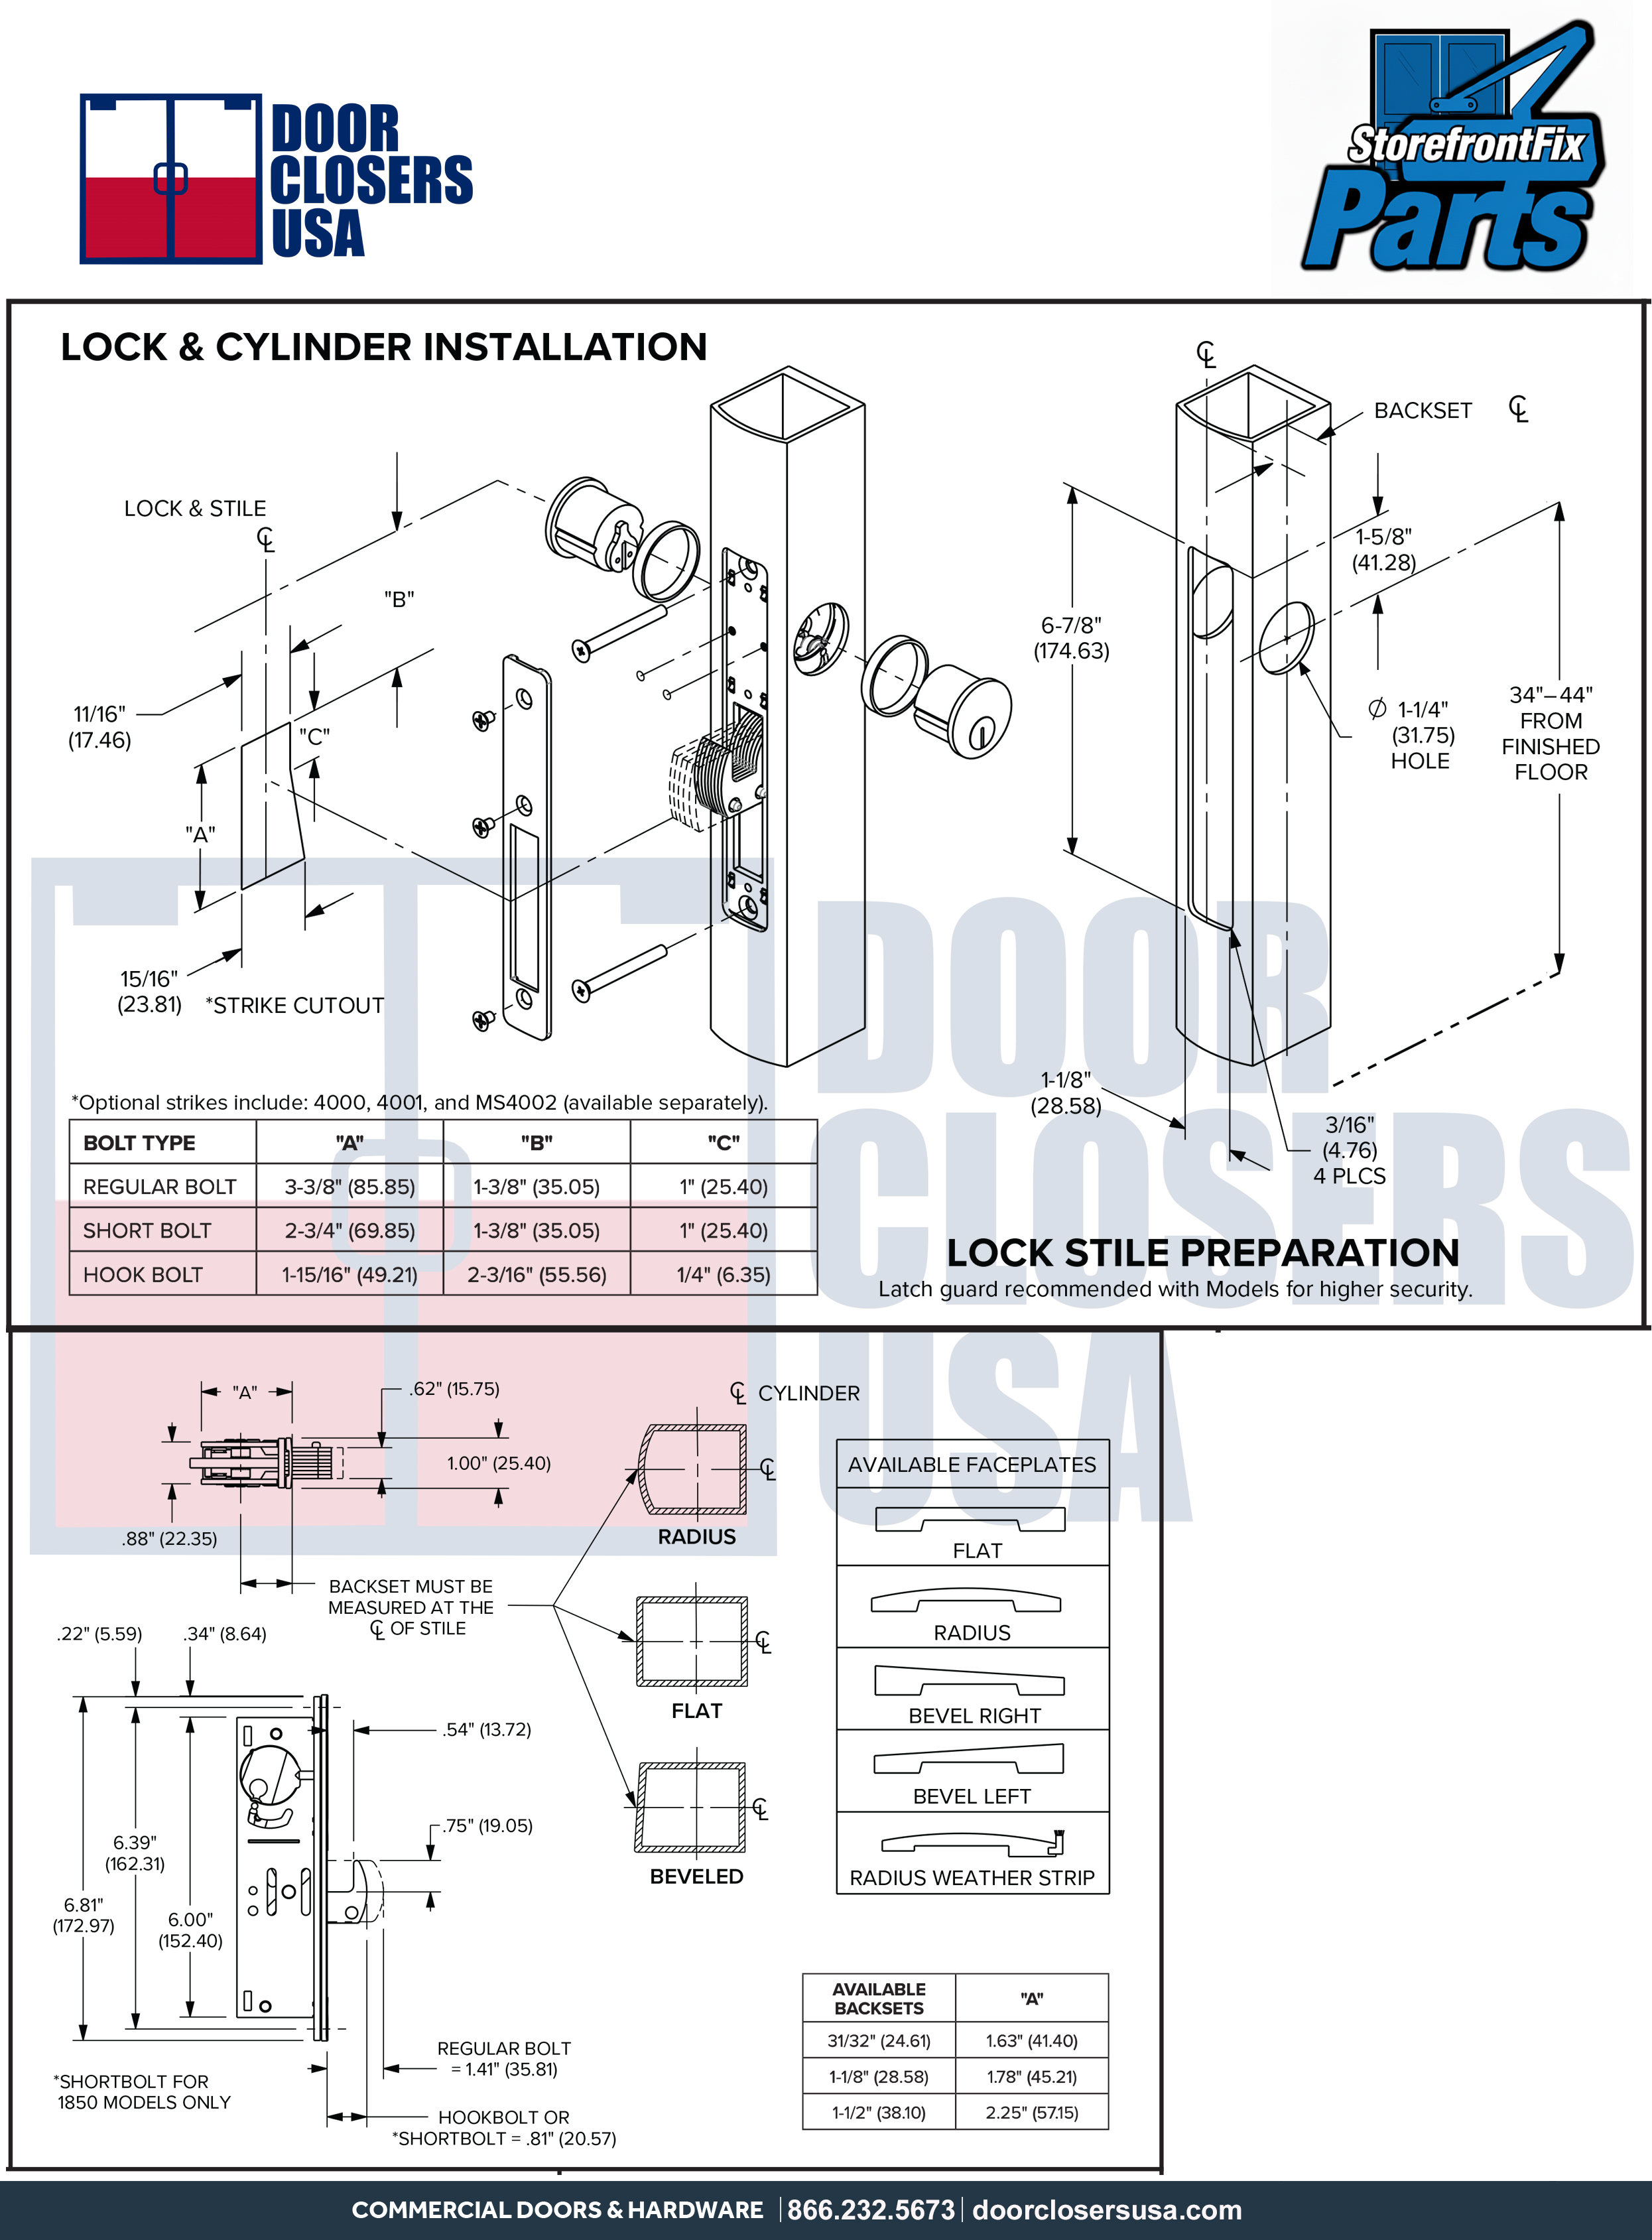
With both cylinders removed, you can now remove the lock body.
Some storefront door preps use spacers inside the stile. If these fall into the door, don’t panic—storefront stiles are hollow aluminum extrusions and the spacers can be retrieved and reused.
Once the lock body is removed, you can often find the backset stamped on the lock.For example, many storefront deadbolts are stamped:1-1/8" backset.
If you don’t want to remove the lock body just to identify it, you can measure backset in the field:
Common storefront deadbolt backsets include:
This video demonstrates multiple repair options:
We can also key cylinders alike for you if you’re changing locks after moving into a new facility.
To reinstall:
Tip: Start cylinders carefully. The threads are fine, so take your time to avoid cross-threading.If alignment is difficult, loosen the lock body screws slightly to create play, then tighten once aligned.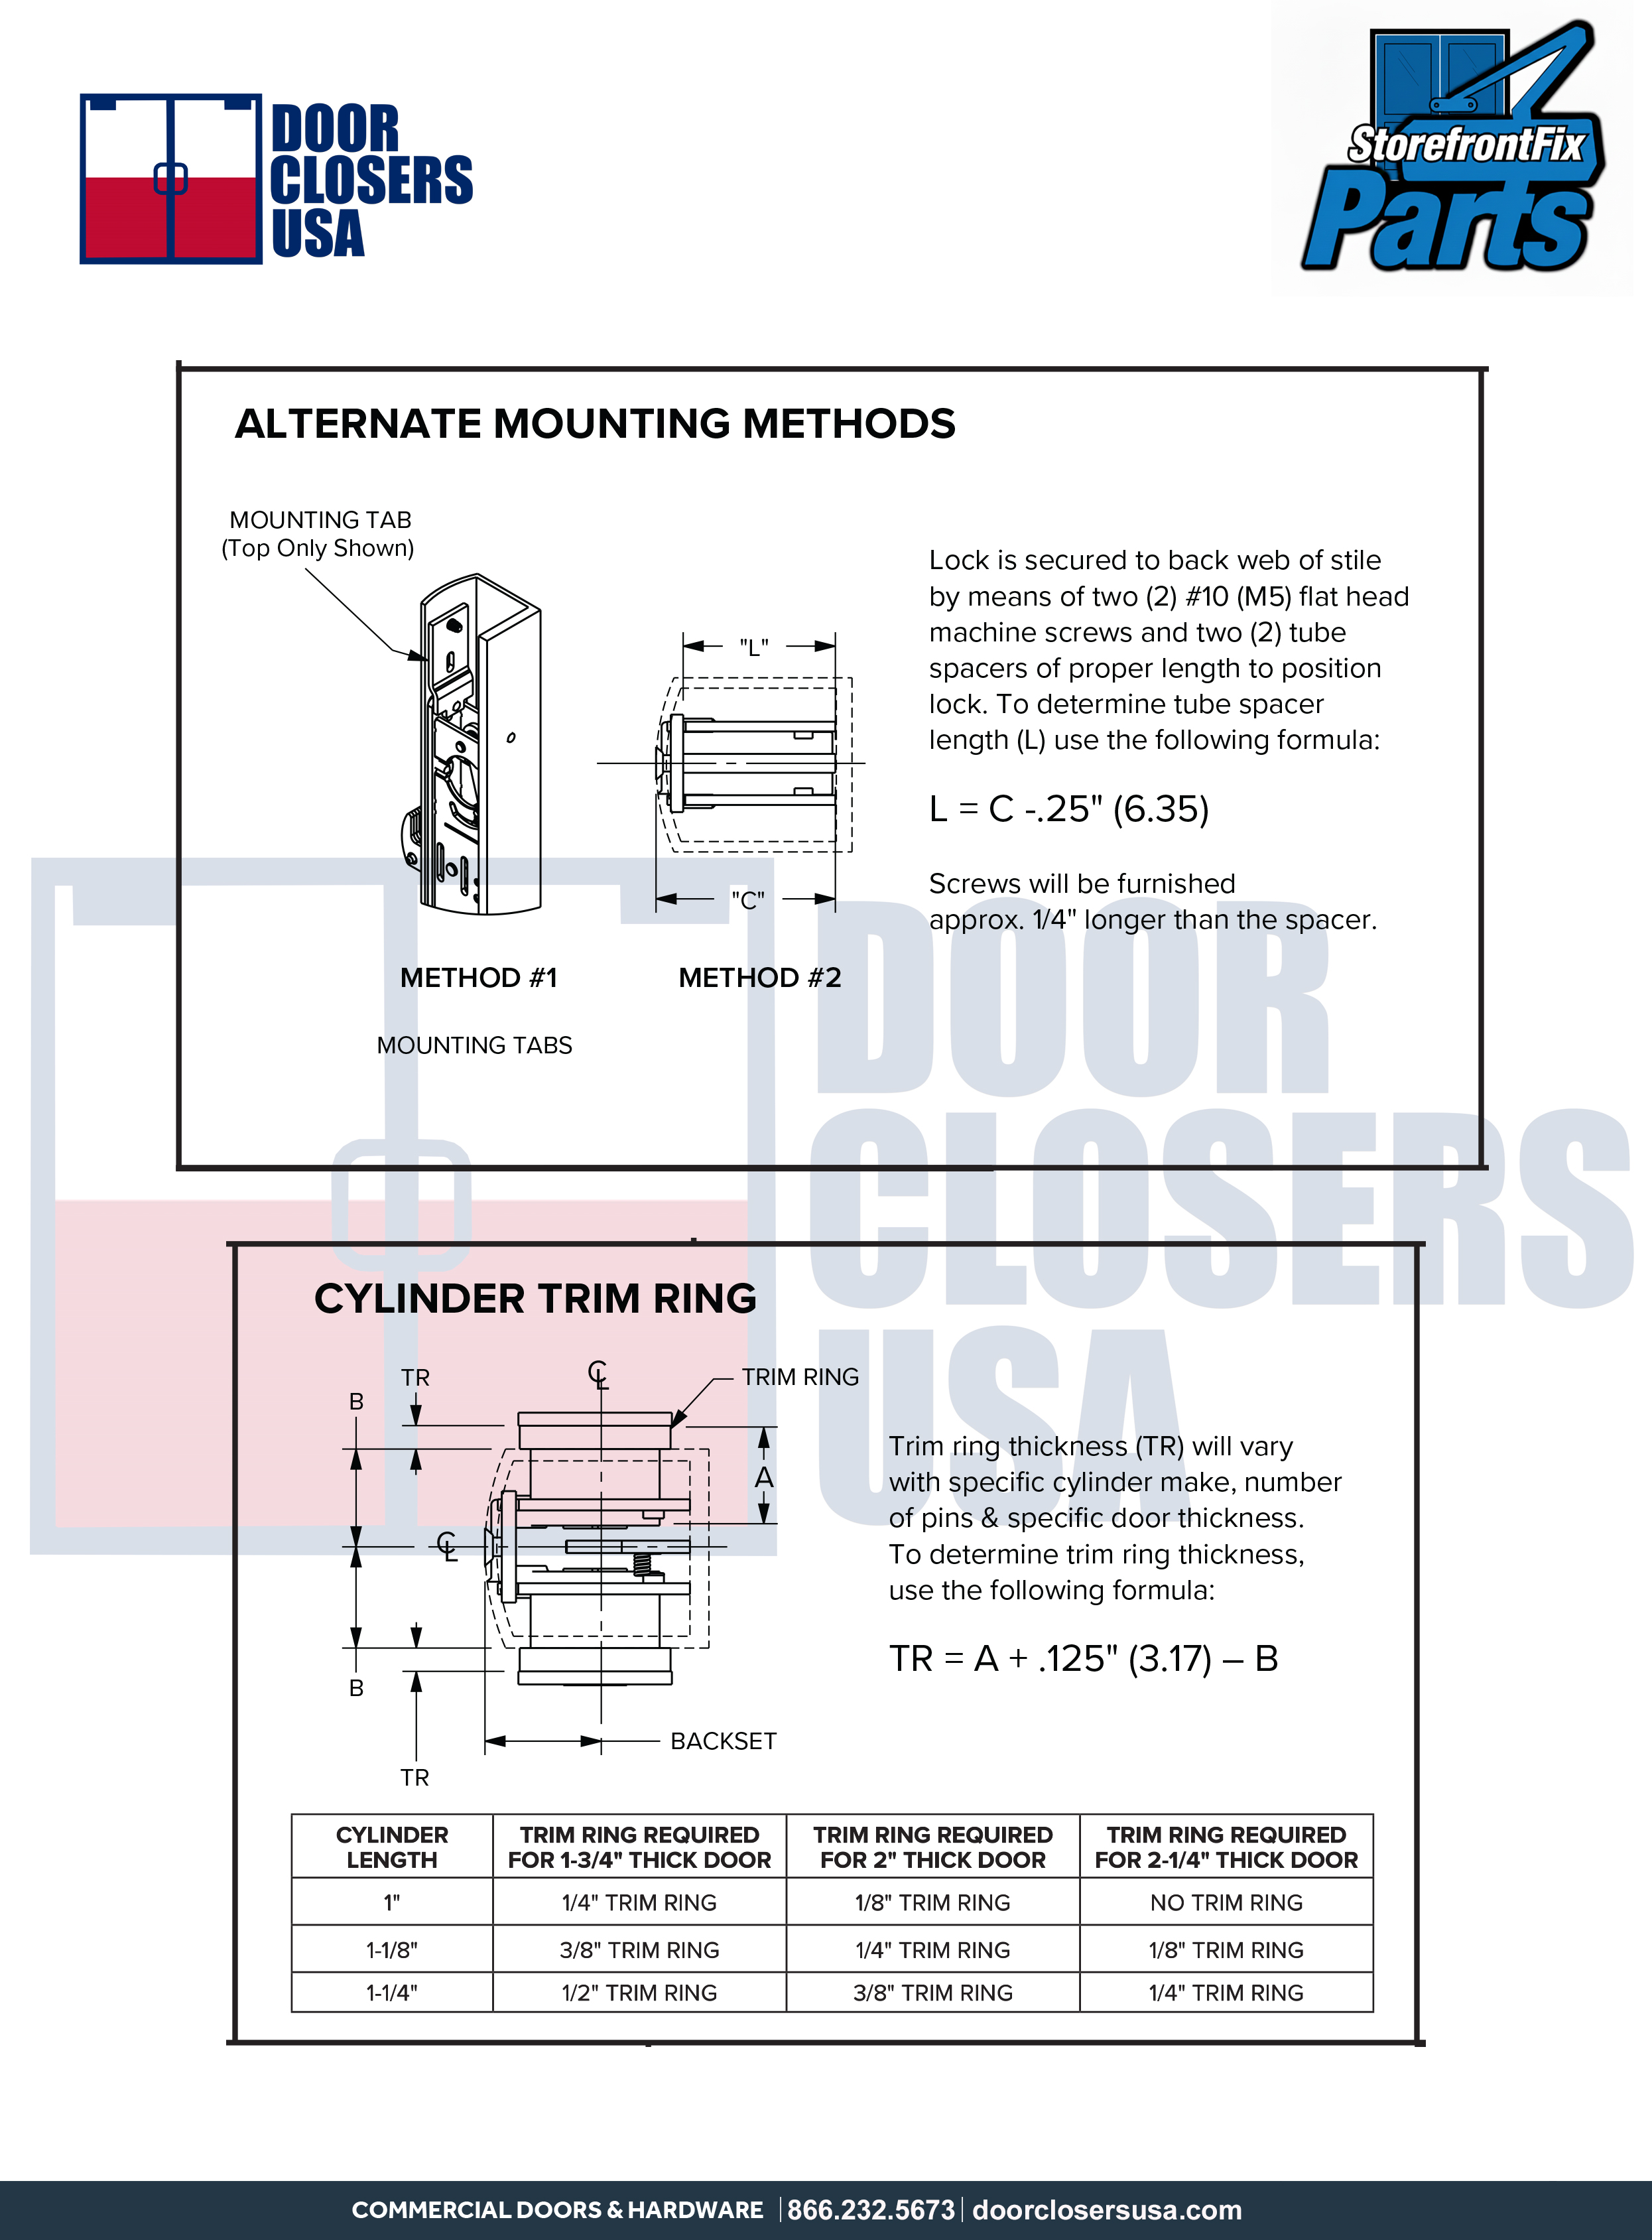
Before finishing the job, always test the lock:
This same general process also applies to hook bolts, deadlatch locks, and mortise cylinder replacements.
All storefront deadbolt parts—including lock bodies, cylinders, thumb turns, trim rings, and relatedcommercial door hardware—are available at DoorClosersUSA.com.
If you have questions or need help identifying your lock, email us, call us, or send pictures of yourdoor hardware and we’ll guide you to the correct replacement.
Thanks for watching, and please like and subscribe.
Prefer to follow along visually? Watch the full video below to see the complete storefront deadbolt lockremoval and reinstallation process step-by-step.

Whether you need a quotation or just have a question about a product. Reach out to us today by calling 866-232-5673 or text us questions and photos at 210-275-8966, and one of friendly specialists will be happy to help!
